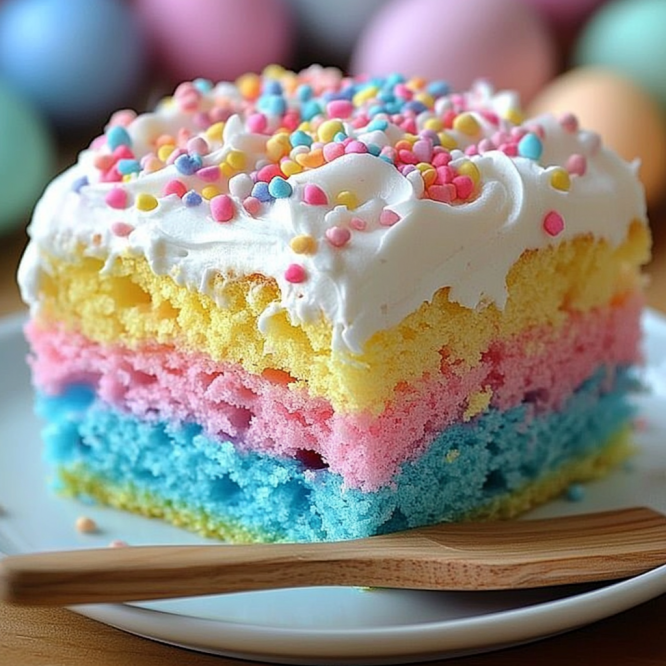
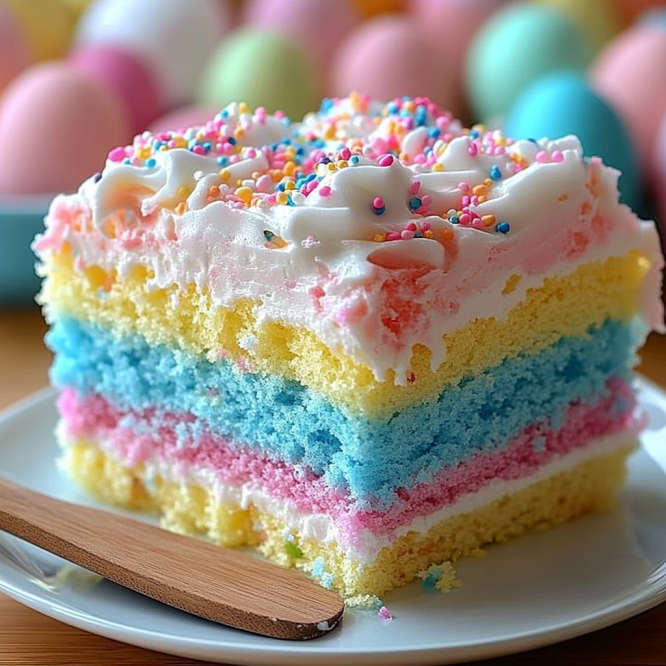
Growing up, Easter was always a magical time at my grandmother’s house. The bright spring flowers, the cheerful egg hunts, and the aroma of freshly baked cakes filled the air with a sense of joy and anticipation. One of my fondest memories is helping my grandmother create her famous Easter Bunny Poke Cake, a delightful dessert that not only tasted divine but also brought our family together in celebration. This cake, draped in pastel colors and topped with a fluffy whipped topping, has become a cherished tradition that signifies the arrival of spring.
The Easter Bunny Poke Cake is a delicious, visually captivating dessert that is sure to be the highlight of your holiday table. With each slice revealing a burst of colorful layers and creamy pudding, this cake embodies the spirit of Easter. It’s a fun, interactive dessert that invites smiles from both kids and adults alike. Let’s dive into this delectable recipe that combines nostalgia with a touch of whimsy to make your Easter celebration truly unforgettable!
Why You’ll Love This Easter Bunny Poke Cake
- Kid-Approved: Fun colors and flavors make it a hit with little ones.
- One-Bowl Wonder: Easy to prepare without messy clean-up.
- Flexible Ingredients: Customize with different colors or flavors.
- Perfect for Spring: Bright and festive, ideal for any Easter gathering.
- Deliciously Light: A fluffy cake with a creamy filling that’s not overly heavy.
Ingredients
- 1 box white cake mix (plus ingredients as instructed on the box)
- Pink and blue food coloring
- 1 package (3 oz) instant vanilla pudding mix
- 1 and ¾ cups cold milk
- 1 container (8 oz) whipped topping, thawed
- Pastel sprinkles for topping
Step-by-Step Instructions
Step 1: Prep the Oven
Preheat your oven to 350°F (175°C). Grease a 9×13-inch baking dish to prevent sticking.
Step 2: Prepare the Cake Batter
- In a large mixing bowl, prepare the white cake mix according to the instructions on the box.
- Divide the batter equally between two separate bowls. Add pink food coloring to one bowl and blue to the other, stirring until you achieve the desired hue.
Step 3: Create a Marbled Effect
Gently pour both colored batters into the greased pan in sections, making a marbled pattern for a beautiful swirl effect. Use a knife to lightly swirl the colors together.
Step 4: Bake the Cake
Bake in the preheated oven for 25–30 minutes or until a toothpick inserted in the center comes out clean. Allow the cake to cool in the pan for 10 minutes.
Step 5: Make Poke Holes
Using the handle of a wooden spoon, poke holes all over the top of the cake, about 1 inch apart, to create pockets for the pudding.
Step 6: Prepare the Pudding
Whisk together the instant vanilla pudding mix and cold milk in a bowl until slightly thickened. Pour the pudding mixture evenly over the poked cake, ensuring it seeps into the holes.
Step 7: Chill and Decorate
Refrigerate the cake for at least 1 hour to allow the pudding to set. Once chilled, spread the whipped topping over the top and garnish with pastel sprinkles for that perfect touch.

Tips & Variations
- Flavor Variations: Swap vanilla pudding for chocolate or butterscotch to change it up!
- Dietary Needs: To make it gluten-free, use a gluten-free cake mix and pudding.
- Customized Colors: Get creative with food coloring to match your Easter theme!
Storage Instructions
Store any leftovers in an airtight container in the refrigerator for up to 3 days. This cake can be frozen for up to 2 months—just be sure to wrap it tightly in plastic wrap and then in foil.
Nutritional Information
- Prep Time: 15 minutes
- Cook Time: 30 minutes
- Total Time: 1 hour 45 minutes
- Calories per Serving: Approximately 290 kcal
- Servings: 12 servings
Frequently Asked Questions
- Can I use a different cake mix?
- Yes, you can substitute any flavor of cake mix, such as chocolate or lemon, to create a unique twist on this recipe.
- How do I make this cake dairy-free?
- Use a dairy-free cake mix and substitute the milk with almond or oat milk.
- Can I prepare this cake ahead of time?
- Absolutely! The cake can be made a day in advance, just wait to add the whipped topping and sprinkles until serving.
- What if I don’t have instant pudding?
- You can make your own custard or use a premade pudding instead, but the consistency may vary.
Serving Suggestions or Pairings
Pair this delightful cake with a refreshing glass of lemonade or a fruity punch. Serve alongside a simple mixed green salad to balance out the sweetness.
More Delicious Recipes
Final Thoughts
Easter Bunny Poke Cake is more than just a dessert—it’s a delicious way to bring family and friends together during this special time of year. I invite you to try this recipe and add your personal touch—maybe using your favorite colors or sprinkles. Share your version in the comments below; I’d love to hear your stories and adaptations! Happy baking, and enjoy the sweet moments this Easter!

Easter Bunny Poke Cake
Ingredients
- 1 box white cake mix plus ingredients as instructed on the box
- pink and blue food coloring
- 1 package (3 oz) instant vanilla pudding mix
- 1 3/4 cups cold milk
- 8 oz whipped topping, thawed
- pastel sprinkles for topping, optional
Instructions
- Preheat oven to 350°F (175°C) and grease a 9×13-inch baking dish.
- Prepare the white cake mix according to the package instructions in a large bowl.
- Divide the batter evenly between two bowls and tint one with pink food coloring and the other with blue.
- Pour both batters into the greased pan in sections and gently swirl with a knife to create a marbled effect.
- Bake for 25–30 minutes or until a toothpick inserted comes out clean. Let the cake cool in the pan for 10 minutes.
- Using the handle of a wooden spoon, poke holes all over the top of the cake, about 1 inch apart.
- Whisk pudding mix and cold milk in a bowl until slightly thickened, then pour evenly over the cake, letting it fill the holes.
- Refrigerate the cake for at least 1 hour to set the pudding.
- Spread whipped topping evenly over the cake and garnish with pastel sprinkles if desired.

